Monday, June 27, 2011

Tarte Tatin

IMG_6545


Every now and again I come home from work to find the Good Cookbook Fairy (my Mum) has visited, leaving behind a shiny, new cookbook for me to devour whole.  Last week I had a visitation and am now the proud owner of the Chez Panisse Desserts Cookbook - it's an easy read, nothing but text with no illustrations, but my what a book!  A combination of classic, clear and well explained dessert recipes and quirky, homegrown spins on those classics.

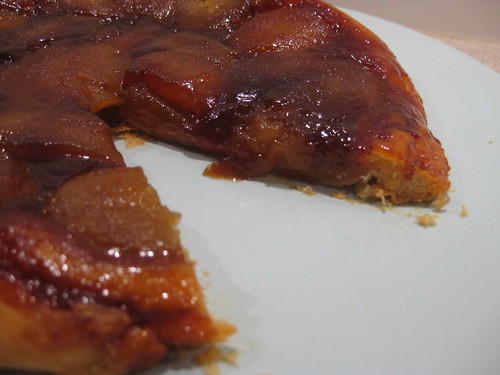
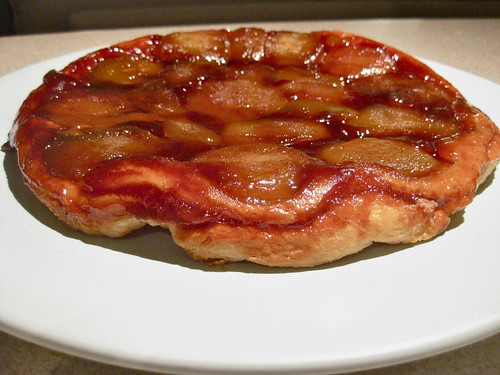
The tarte tatin recipe immediately jumped out at me.  I am now the owner of a lovely red cast iron skillet, which was begging to have such a dish cooked in its non-stick walls.  Now, the tarte tatin was altered quite a bit by me to cope with the fact that I ran out of white sugar, and didn't have the time to make puff pastry, but oh what a recipe!  It's the type of classic that lends itself to adaptation because it's so straightforward it's magic.  But, the wonderful thing is, once you've mastered the Chez Panisse basic recipe, you can then move onto Lindsey Remolif Shere's other tarte tatin recipes (this is what I mean by her spins on classic desserts) - try Pear Tarte Tatin or Quince and Apple Tarte Tatin, maybe with a scoop of Clove Icecream or Cognac Caramel Sauce.  It's definitely going to become one of my high rotation cookbooks!

IMG_6518


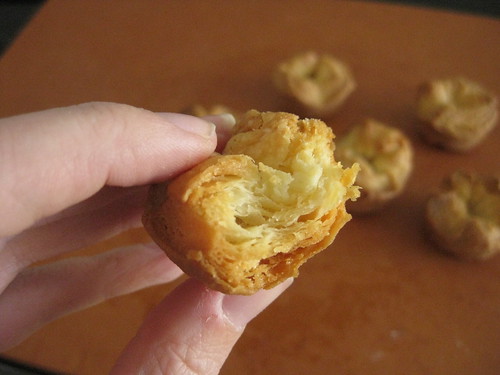
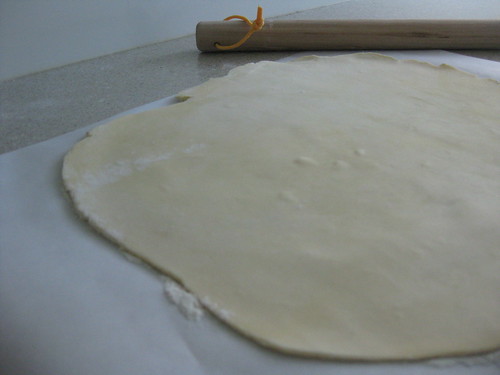
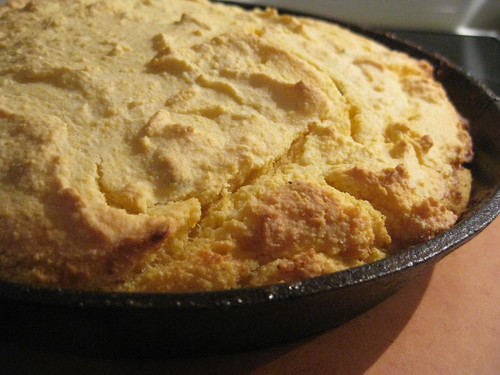
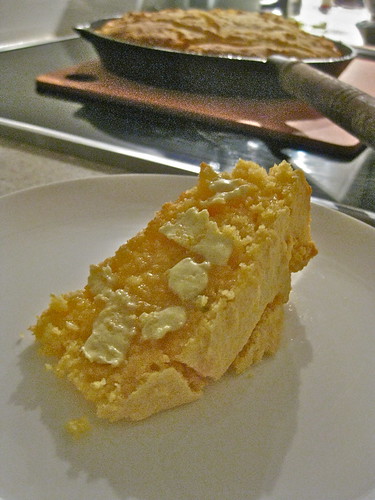
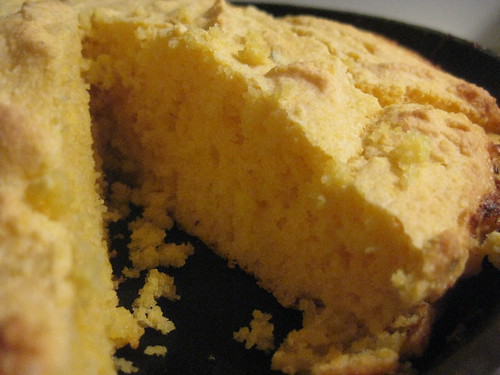
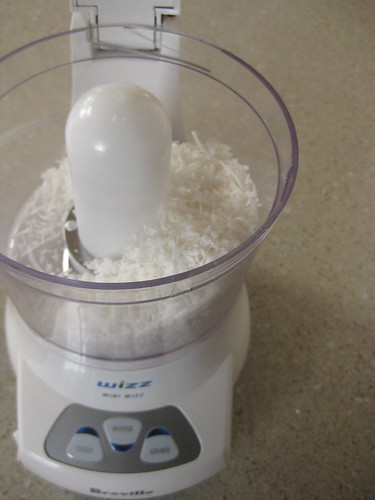
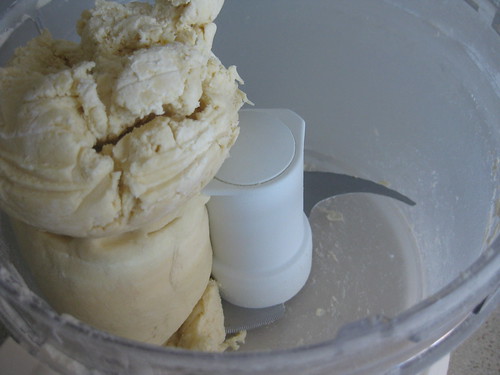
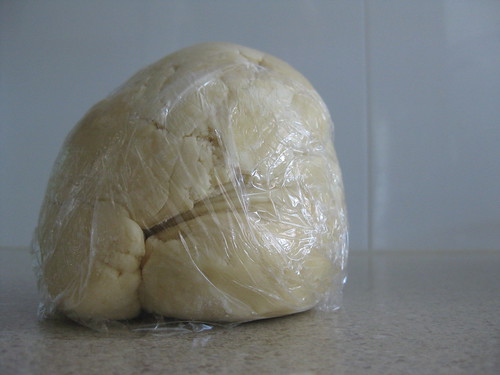
But I digress.  The key difference in my version of this recipe was the substitution of Maggie Beer's sour cream pastry for the fiddly puff pastry.  Good god, what a triumph of convenience and delicious flakiness this recipe is - thank you Maggie Beer for your genius!  Simply set up your food processor, add flour and butter.  Pulse.  Add sour cream.  Pulse.  It quickly forms a ball.  Wrap in cling film.  Refridgerate.  Roll out.  Bake.  And, oh my goodness, what a glorious pastry this is.  It has all the resilience of a short crust, with the flakiness of a rough puff (see the picture above, which shows the layers in my left over pastry scraps) and a wallop of flavour from the sour cream you just don't get in a lot of other pastries.  It is the perfect combination for a tart tatin, and I highly recommend you give this recipe a go!

IMG_6540


Tarte Tatin

Ingredients

-  one portion of sour cream pastry, rolled flat (recipe below - make this first, before starting the tarte)
-  2 tablespoons unsalted butter
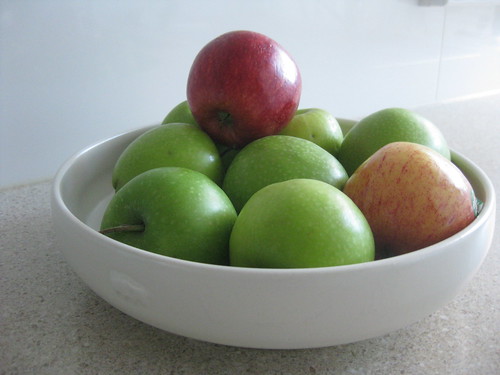
-  approximately 6 good-sized Granny Smith apples, peeled, cored and cut into four pieces
-  1 teaspoon cinnamon
-  6 tablespoons sugar (I used raw caster sugar with two tablespoons white sugar)

Preheat the oven to 200 degrees Celcius.

IMG_6499


IMG_6503


IMG_6505


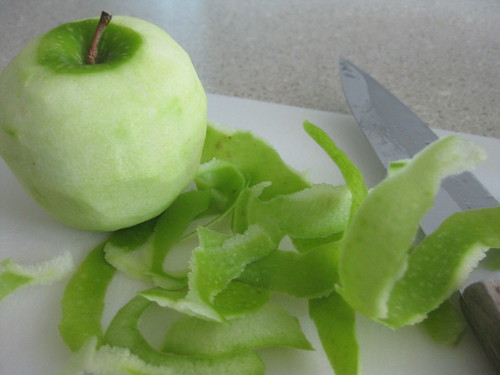
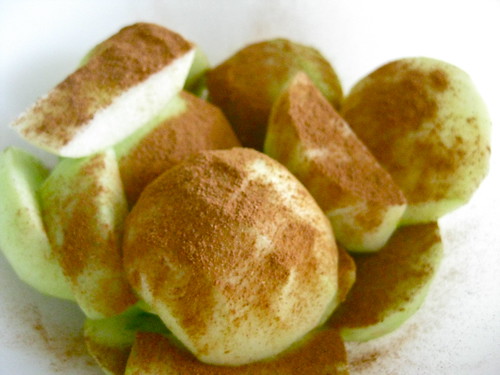
Peel, core and chop your apples.  You should get two large domed "halves" and two smaller pieces out of each apple.  The smaller pieces are good to fit between the larger half-circles.  Toss these in a bowl with the cinnamon.

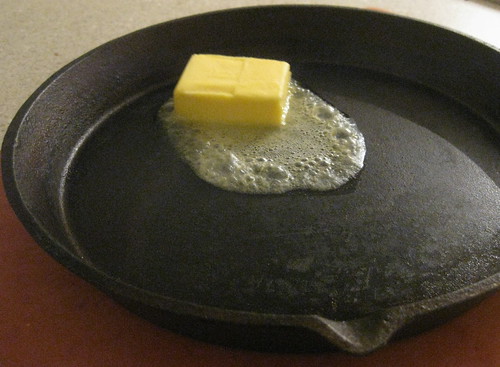
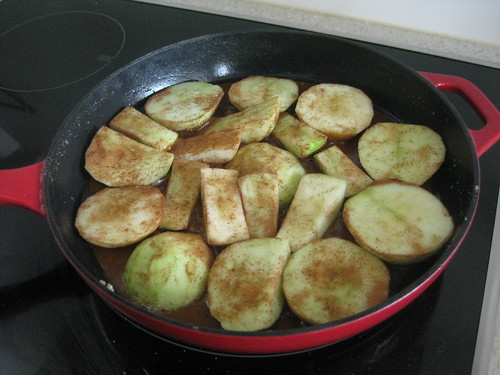
Heat a cast iron skillet (or suitably heavy-based, oven safe frypan) on the stove on a medium-high heat, then melt the butter.  When melted, add the sugar and stir over heat until it is golden caramel and liquid.  Take it off the heat before it burns because it will continue to cook in the latent heat in the frypan.

Now, place your apples, round side down in the pan.  I put one large, circular piece in the centre, did a ring of the other remaining circular pieces around the outside of the pan, and then filled in between with the smaller pieces.

IMG_6513


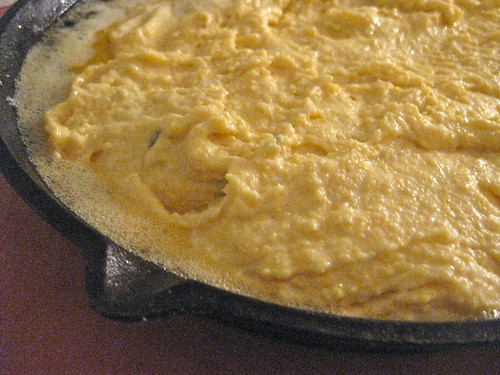
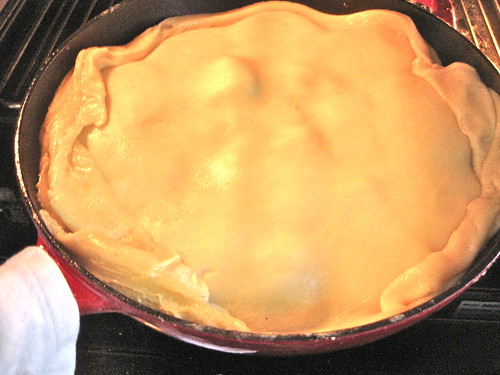
Cover the pan with the rolled-out pastry.  Allow to soften, and then roughly tuck the excess pastry in around and between the apples.

IMG_6514


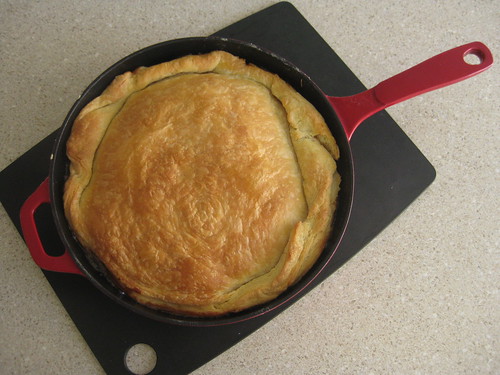
Pop the pan in the oven 35-40 minutes (you'll know when the pastry is golden brown, it's time to come out).  You can bake this in advance and reheat it when you are ready to serve, but just make sure the caramel is gooey and liquid when you are ready to serve.

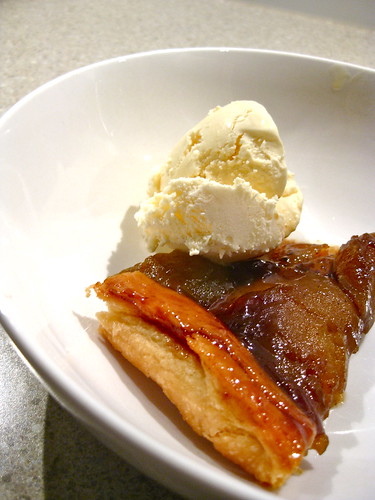
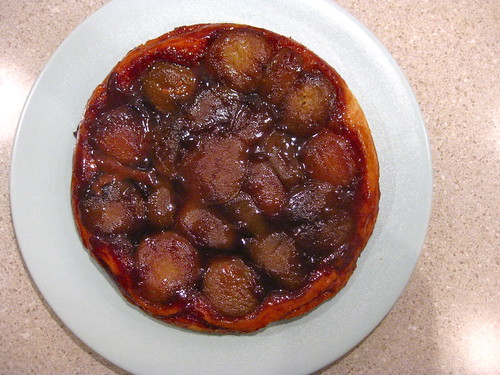
Now comes the fun part.  Cover the frypan with a large plate and (hopefully with assistance from a good friend) flip the pan, so the tarte plops out onto the plate.  Now, slice and devour with ice cream or cream.

IMG_6516


IMG_6549


IMG_6543


Maggie Beer's Sour Cream Pastry


Ingredients


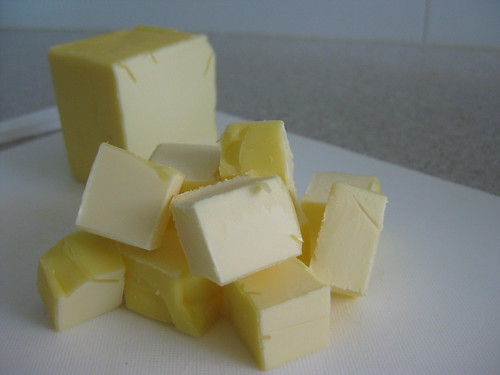
- 200 grams unsalted butter, chilled and diced
- 250 grams plain flour
- 125 ml sour cream (full cream)


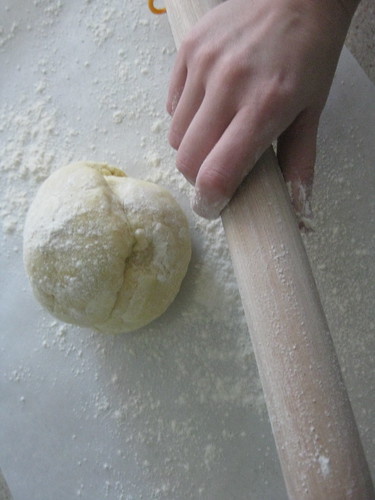
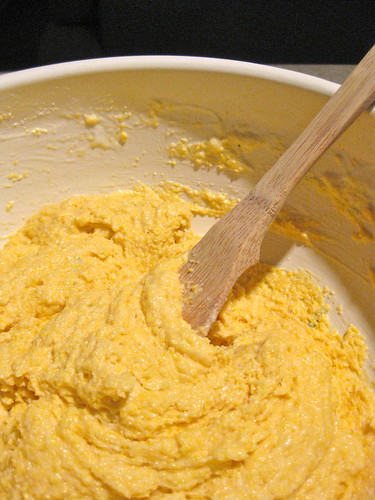
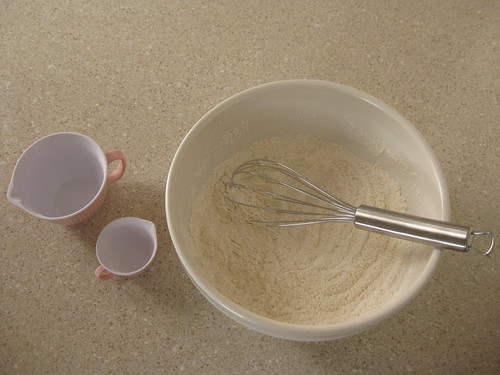
Set up your food processor.  Add flour and then butter.  Pulse until it looks like fine breadcrumbs.  Add sour cream, pulse until it forms a ball.  Turn out onto cling film, cover and refridgerate for at least 20 minutes.  

IMG_6486


IMG_6492


IMG_6494


Before starting the tarte tatin recipe above, turn the ball of pastry out on a floured surface (I use a sheet of baking paper for ease of clean up), rub your rolling pin with flour, then roll out the pastry to a 3 millimetre thickness.  Cut to fit your frypan, with some excess over the sides to tuck around the apples.

IMG_6507


IMG_6508


Monday, June 20, 2011

Truffle Hunting

IMG_6457


This post is dedicated to my friend Nathan and his Mum whose passion for truffles seems endless and who own the French Black Truffles of Canberra truffle farm.  They allowed me to tag along for some truffle hunting (and digging) in what turned out to be one of the most enjoyable days I've had in a good long while.

IMG_6468


As my friends know all too well, I love truffles and have an endless array of truffle salt, truffled risotto, truffle paste etc etc in my pantry (including an apron given to me by the Red Avenger with the slogan "Nobody knows the truffles I've seen" on the front).  I don't know what it is about the musky, dark flavour of the truffle that appeals so much.  Someone described it to me once as the taste of pheromones but, having gone digging for truffles and sniffed the soil for their sweet scent, I can honestly say that truffles smell like damp earth - yummy earth though!  Why this tastes so good to me I don't understand but it definitely appeals.

IMG_6461


The day we went digging it was cold but sunny, the best kind of crisp, Canberra winter day.  The truffle dogs were out, scenting the air and running with happy, doggy purpose between the rows of French and English oak trees.  Every now and again they caught a whiff of the dark, warty fungus and headed for one of the trunks, sniffing at the ground and indicating with a swipe of their paws where a truffle could be found.

That's the point when the human hunters get down on their stomachs and, rather like the dogs, smell the earth.  While I am no expert, I was told that what you're looking for is the mild, sweet scent of a ripe truffle, and not the more acetate, sicklier smell of either an under ripe or an over ripe truffle.  Then you get out a small trowel and a paint brush - I felt very Indiana Jones - and very gently excavate the truffle.  If it feels firm, but not too hard, smells right and gives a little in the earth, you take a very expensive gamble and shuck it out of the soil at the base of the tree.

IMG_6465


IMG_6467


Once you get them back home, you need to clean off the soil with a good nail brush or a toothbrush, and have a good look at them.  Some are not of a high enough quality to be sent to market, others require paring back where the ridges and knobs have created crevices which contain soil that cannot be removed.  Finally, the ones which will be delivered to restaurants and providores around town are weighed and ready to go.

IMG_6474IMG_6480


IMG_6477


This year is shaping up to be a good crop, but it's still early days so I am very much looking forward to going out later in the season when the frosts get heavier and the grade of the truffle even higher.  Hopefully Sherry (and Snuffles) will let me visit again soon.

What I love about the people involved with the farm, from Sherry and Nathan to the truffle dog trainers, is their passion for this strange black fungus and their interest in what trees seem to produce more or better truffles, and the intricacies of why that might be the case.  It's as much art as science, but as truffle farming develops more of a history in the Canberra region, I am just glad there are people out there pioneering the production of local truffles, so we all get to enjoy them.

Also, how cute is Snuffles, the truffle hunting spaniel?

IMG_6479

Monday, June 6, 2011

Coffee, How Do I Love Thee? (Coffee Grinder Road Test)

IMG_6443


I vaguely remember a time I did not need a coffee in the morning as an essential part of my routine, but that memory is about as dark as my morning cup of coffee poured steaming hot out of the plunger, which, frankly, smells pretty darn good. Most of you would probably agree that life begins after the first cup of coffee and those of you who don't, I shake my head at thee!

There was a time when the first coffee of my day had to be milky and frothy and, preferably, made by a slightly surly barista at my nearest decent cafe.  More recently my routine has adapted to include 20 minutes first thing in the morning wrapped up in my fluffy robe and ugg boots, pottering around in the kitchen, boiling the kettle, setting up the plunger and breathing in the heady scents and flavours of my morning brew.  I still add milk, but I prefer the stronger flavour of a freshly plunged cup of joe.

IMG_6456


My favourite sources of coffee beans are two local Canberra roasters who specialise in both small batch roasts and single origin beans.  Wagonga Coffee sells their wares (and a particularly tasty latte made with their bean-of-the-day) at the local farmers' market at EPIC on a Saturday morning.  I strongly recommend high-tailing it directly to their stall for a heart-starting brew first thing on arrival at the markets, and then popping around to their sales counter to nab yourself some Cuban Turquino beans.

I also love the slightly earthier blends being roasted by the Lonsdale Street Roasters at their rather "Melbourne" cafe in Braddon, and it's their Honduras single origin beans that I am grinding up today in my new coffee grinder road test.  Grab a panini while you're there, if you can find a table!

IMG_6435

IMG_6436

Now, I have to confess that - sans coffee grinder - I have always requested the Wogonga and Lonsdale Street Roaster fellas (pretty) please grind up my beans for me to the perfect consistency for my plunger.  *True coffee aficionados insert gasp here*

I have resisted buying myself a grinder for a number of reasons. Firstly, laziness.  Grinding up your own coffee is a great idea on a weekend when you have the time to spend getting out the machine and doing your thing, but on weekdays, when it's a choice between using something pre-ground or having time to put on makeup, I know which one I choose.

Also, my kitchen cupboards (and most of my living room storage) is already groaning with gadgets, food mixers, processors, burners, weighers, mashers, slicers, dicers and freezers.  It is now instinctual for me to resist the temptation to buy yet another single use machine to add to the pile.  And, finally, I have actually been trying to save some money.  Another shock-horror moment, I know.  But when a wonderful gift voucher from my personal kitchen-crack-house of choice (Essential Ingredient) came my way, it seemed time to give into the inevitable and buy myself a grinder.

Luckily, they had a pretty reasonably priced Bodum option in a pretty cherry red (yes, I am indeed that shallow) at just on $70.  I should point out that the next price point was around the $300 mark - a Kitchenaid coffee grinder the colour of clotted cream.  This, however, was not only ridiculously out of my price range, but was also about three times as large as my new Bodum.  I figured if I was going to give over precious storage space to this new gadget, then I could at least be sensible about it.  The choice was pretty easy (although I still find myself staring longly in the window at the Kitchenaid from time to time).

So this is my new Bodum coffee grinder...

IMG_6431


It's pretty straightforward to use.  Insert beans (the lid is a helpful measure for the maximum amount to add), plug in, pop on the lid and press the black button on the side.  You can see through the clear lid to check whether it's hit the consistency you want.  Done and done.  It's relatively easy to clean too.  No water or soap, just a brush or soft cloth.  I would note that the rubber external casing has a bit of static to it, which makes it hard to get it 100% clear of grinds, but it's not an insurmountable issue.

IMG_6440


IMG_6449

IMG_6444

I am pleased Bodum's kept this so intuitively easy to use.  I already have a Bodum stick blender in a gorgeous duck egg blue, and it's a reliable and aesthetically pleasing addition to the kitchen.  As with the stick blender, which doesn't get used every day, I can't say that I will be brushing off the grinder every morning to grind my coffee up fresh, but it will definitely be whipped out on the weekends for some fresh ground java while I potter around in my robe.

Finally, one last little feature I love is the small winding do-hickey underneath the grinder for the electrical cord - it even has a little mouse-door for the last little bit of the cord to peek out of.  It's a thoughtful design detail I appreciate.

IMG_6450


IMG_6451


Oh, and the freshly ground coffee was pretty darn good too!  Smoky, flavourful and heart-startingly good.  Just as coffee should be.

IMG_6452

Saturday, June 4, 2011

Buttermilk & Sage Cornbread

IMG_6389


There were a few reasons this cornbread recipe came to be.  I guess it all started with me being at home sick with a nasty head cold and in need of comfort food.  The core of this recipe is the skillet cornbread recipe my Texan Uncle Chip bequeathed me (it was his mother Bonny's recipe) along with my cast-iron skillet, which is only ever used for cornbread and is never, ever washed - only wiped cleaned, oiled and then returned to the cupboard.  So, given my infirmity, I decided a steaming hot slab of cornbread, fresh from the oven and slathered in butter was just what the doctor ordered.

Then my friends, Matt-in-the-Hat and the Divine Ms R, decided to bring the dinner to me and my couch (which, in a side note, is an excellent way to make a girl feel better, especially if it also involves watching some West Wing while eating the aforementioned dinner that has been brought to your door).  As a result, I adapted my Great Aunt Bonny's Texan cornbread recipe to make it gluten-free for Mr M to enjoy, and at the last minute decided to add in a little of my homegrown sage to jazz it up a little.

IMG_6364


The great part about this cornbread recipe is that you can add things like sage, or jalapeno chillies, or sliced spring onions, or just keep it simple, stupid.  I also happened to have some buttermilk left over from last weekend's foray into Coconut Cupcakes, which I threw into the mix.  It produced a light, moist cornbread and, while not strictly essential - you could just use milk to thin out the batter - the buttermilk really added a lot to the final, moist result.

Finally, although I used a gluten-free self-raising flour (one of the new gluten-free direct substitutes now on the market), this recipe is just as good with plain old normal self-raising flour!  In Australia, you generally can't get the kind of stone-ground cornmeal used in the US for cornbread, so just use polenta instead.   I recommend scarfing this down straight out of the oven, either as a snack on it's own or as a side-dish to sop up the gravy from down home chicken and dumplings or slow-cooker casserole.

IMG_6394


Buttermilk & Sage Cornbread

Ingredients
- 1 1/2 cup cornmeal (or polenta)
- 1 1/2 cup self-raising flour (or gluten-free self-raising flour)
- 2 teaspoons salt
- 2 tablespoons brown sugar
- 1/2 teaspoon chopped fresh sage leaves
- 2 eggs
- 2 cups buttermilk
- some extra milk if thinning out is required (approx 2 tablespoons)
- 50 grams melted butter for the batter
- 50 grams butter for the skillet

IMG_6371


First step - preheat your oven to 180 degrees Celcius (if not fan forced, preheat to 200 degrees) and put in your skillet to heat up.  Your skillet should be heavy, preferably cast iron, pre-oiled and have the kind of handle that is not going to melt in the oven.

Next, in a large bowl use a whisk to combine your cornmeal, flour (the gluten-free stuff is quite powdery, so use an apron!), sugar and salt.  Fold through the chopped sage.

IMG_6368


In a separate small bowl, whisk your eggs and slowly add the melted butter, whisking all the time to ensure the hot butter doesn't cook the eggs.  Now, make a well in the centre of the dried ingredients and add the egg mix.  Use a wooden spoon to combine, but it will look pretty "gluggy".  Next, add the buttermilk one half-cup at a time.  The batter needs to be at a pouring consistency, so add in the milk if necessary one tablespoon at a time, until it looks thick but pourable.

IMG_6374


Now, take a moment to add the butter to your sizzling hot skillet - it should melt pretty quickly.  Swirl it around to make sure it coats the skillet, then add it back into the oven for about a minute.

IMG_6380

IMG_6383

When the butter is melted (but not burned!), pour in the batter, which should sizzle as it hits the cast-iron.  Pop it back in the oven and bake until it's risen and golden brown on top - around 20-30 minutes.

Slice immediately and serve piping hot with melting butter.

IMG_6392


IMG_6388

Thursday, June 2, 2011

Coconut Cupcakes and Vanilla Frosting

IMG_6359

Firstly, let me acknowledge the growing coconut theme at Four Figs.  I don't know if this is the product of my subliminal desire for tropical warmth as the weather grows colder, or if it's simply that the curling, white shreds of dried coconut sitting in my cupboard look so irresistible.

IMG_6320


Last post's coconut bread had a wintry spiciness from the cinnamon.  By contrast, this week's coconut cupcakes have a delicate vanilla undertone and look pretty as a picture iced and dipped in shaved coconut, and finally served in silver foil cases.  I made this batch to take to a friend's come-and-see-my-renovations afternoon tea and they looked so sophisticated laid out on my silver-edged glass platter.  All that was missing was a couple of long flutes of sparkling champagne to go along with them.  We got by with some classic gin and tonics though.

This recipe is another beauty from Martha Stewart's Cupcakes cookbook.  My personal favourite so far has been the Red Velvet Cupcakes with Cream Cheese Frosting, but this one is also a lovely addition for something a little less rich and it has such an appealing snow-ball presentation.

The technique for flavouring the batter was really original, and I am dying to try it out in different cakes and breads and see how it goes.  You use a food processor to grind shredded coconut into a powder and then fold it into the dry ingredients (flour, baking powder, salt), providing a subtle coconut flavour without the metallic undertone of coconut essence.  The moistness comes from the butter and the coconut milk.  As for the frosting, I altered Martha's recipe by using coconut milk to flavour and thin out the buttercream, and it turned out pretty well.  I am curious to see if these cupcakes could take a cream cheese frosting, or whether they would be overpowered by the sweet-sourness of it.  But that is an experiment for another time...

IMG_6356


Coconut Cupcakes and Vanilla Frosting

Ingredients

Cupcakes
-  1 3/4 cups plain flour
-  2 teaspoons baking powder
-  1/2 cup shredded, dried coconut
-  180 grams butter, unsalted (make sure it's nice and soft at room temperature)
-  1 1/2 cups white sugar (if you use raw sugar that's fine but it will change the colour and make the cupcakes a little nuttier in flavour)
-  2 whole eggs (large) and 2 egg whites (all room temperature)
-  1 1/2 teaspoons vanilla extract (don't use essence, it just doesn't taste as good)
-  3/4 cup coconut milk

Frosting
-  360 grams butter, unsalted (again you want this to be room temperature)
-  4 cups icing sugar
-  1/2 teaspoon vanilla extract
-  1 1/2 tablespoons coconut milk
-  also keep a little bit of shredded coconut for topping the cupcakes

Let's kick off with the important things - preheat your oven to 180 degrees Celcius and line two regular muffin tins with cupcake liners (should make between 20-24 cupcakes).

Now, set up your food processor (I have a fab mini-processor that is really useful for things like this) and grind up your shredded coconut into as close to a powder as you can get.

IMG_6322IMG_6324

One of the things I love about Martha's cupcake recipes is that you generally don't have to sift your dry ingredients.  Instead, you pop your flour, baking powder, ground coconut and salt, and whisk it all together in a bowl.  This aerates the flour etc without having to mess about with a sifter.

IMG_6328


Next, you focus on the wet ingredients.  Set up your stand mixer, or if you don't have one use a electric beater and a nice large bowl, and on a medium-high speed cream the butter and sugar until it's light and fluffy.  One by one, beat in the whole eggs and then the egg whites and, finally, the vanilla extract.  If you are using a stand mixer, you should scrape down the sides of the bowl periodically to ensure it all mixes properly.

IMG_6336


IMG_6339


IMG_6344


Now, on a lower speed, add the flour in three lots, mixing in the coconut milk in between each addition.  Don't over mix this, but make sure it's all combined properly too.

IMG_6340

Then, fill the cases up to about 2/3rds of the way full and bake.  Don't forget to switch your muffin tins around in the oven, so they cook evenly.  And remove them after 20 minutes, or a cake skewer comes out clean.

IMG_6347


IMG_6350


I suggest you remove them fairly quickly from the tins (so they don't continue to cook and get tough) and leave them to cook on wire racks.  They should be completely cool when you ice them - you don't want the icing melting right off them.  If you're running short of time, pop the wire racks in the fridge to cool them quickly.  It's not ideal, but it does the trick.

Next, wash out your mixer beaters and bowl because you're going to use them to mix up your frosting.  Plop (and it should plop, if you've let it reach room temperature) your butter into the bowl and whip it until it's gotten thicker, creamier and pale.

Reduce the speed to roughly medium, and add in your icing sugar about 1/2 a cup at a time.  You'll need to scrape down the sides of the bowl every so often, and after a couple of additions speed up the beaters to aerate the icing.  Don't forget to put it back onto medium when you add in the next half-cup of icing sugar.  Finally, add in the vanilla extract and coconut milk and give it one last pulse.  It's done!  (Just note that, while this keeps in the fridge in an air-tight container for up to 10 days, you do need to let it come to room temperature before you ice any cupcakes with it.)

IMG_6351


Finally, using a butter knife or spatula, ice your cupcakes fairly simply.  Sprinkle your shredded coconut on a plate and then roll the top of your iced cupcake in the coconut.  It's a simple finish, but it looks like an edible snowball, and who doesn't want one of those?

IMG_6355