
I should explain the genesis of this recipe a little more. In Jakarta I frequently had folks over for dinner on school nights - the benefit of a maid and driver to run around and do the shopping for you. While I still cooked everything, I didn't have to stop off at the supermarket on the way home etc etc and my house was always sparkling clean when I arrived. As a result, I developed a lot of "in the oven in an hour" dishes and always made sure to have some staples like dried porcini mushrooms and (gasp) dry lasagna sheets in the cupboard - and pre-cooked bolognese sauce in the freezer - for the arrival of impromptu dinner guests.
But one night, just when I was safe in the knowledge that the four friends arriving at my dinner table in an hour would be enjoying lasagna bolognese prepared in a jiffy, the rug was pulled out from under me with the advice that one of the guests was a vegetarian (double gasp).
Now, I seem to have an inordinate number of vegetarian friends and a correspondingly large repertoire of vego-friendly dishes for just such an occasion. But, on this night, I discovered the dining proclivity of aforementioned guest after my wonderful maid had departed for the night. Disaster! Rather than force the vegetarian to nibble on green salad all night, my recipe was born.
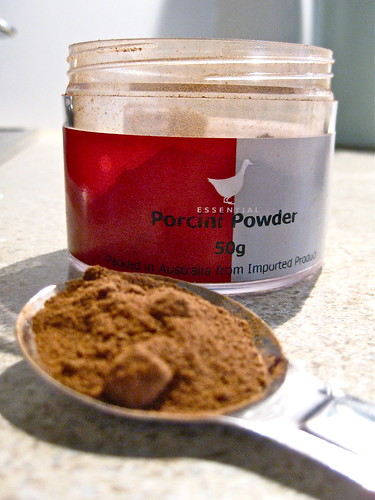
Over the last few years the dish has been refined and refined, so now it's rather more complicated than the original. I have added a variety of chopped fresh mushrooms to my dried porcini and I encourage you to make or buy fresh pasta sheets rather than dried (although dried still works in a pinch). I also use truffle oil and a little porcini powder, but these are not strictly necessary and I have given you options if you don't have access to these ingredients. The real key to the dish is home-made bechamel sauce, which is actually very easy. Butter, flour, (and a litre of) milk. That's it.
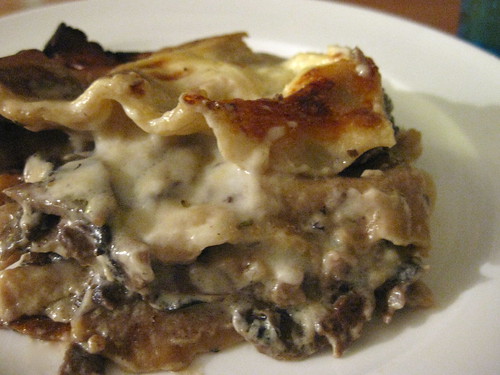
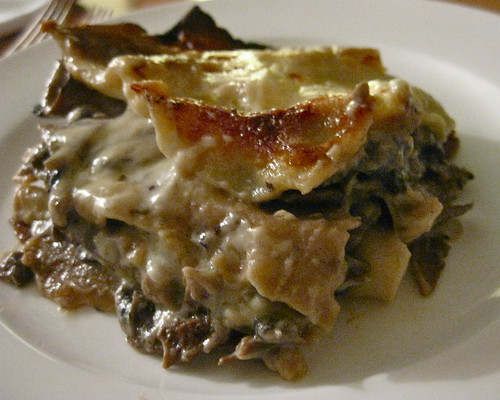
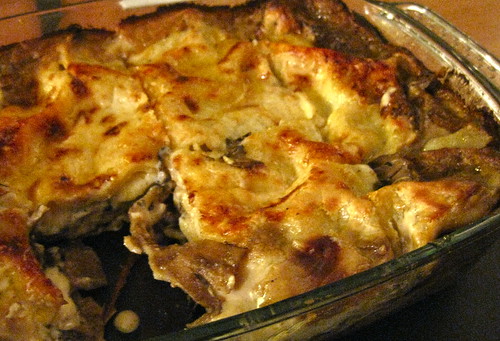
So please forgive the un-photogenic final shots. It may look like a blob of brown and cream goo, but god what a delicious blob!
Mushroom Lasagna
Ingredients
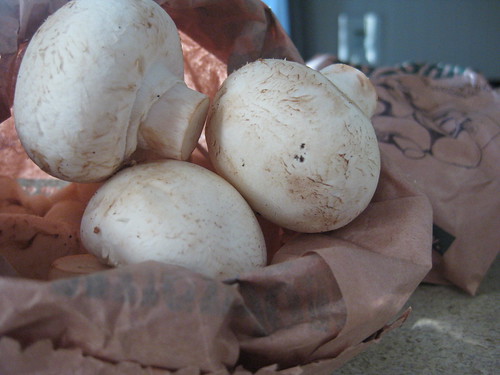
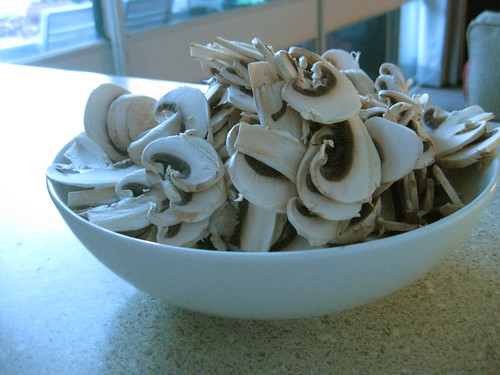
- 200 grams field mushrooms, sliced
- 350 grams button mushrooms, sliced
- 200 grams shitake mushrooms, sliced
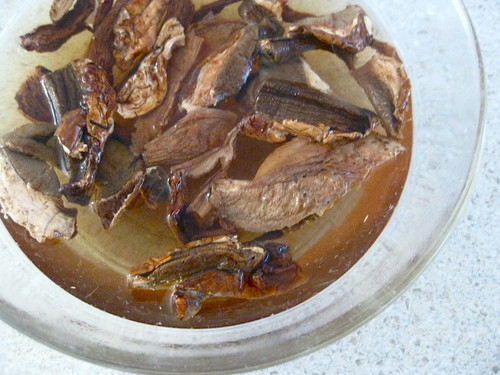
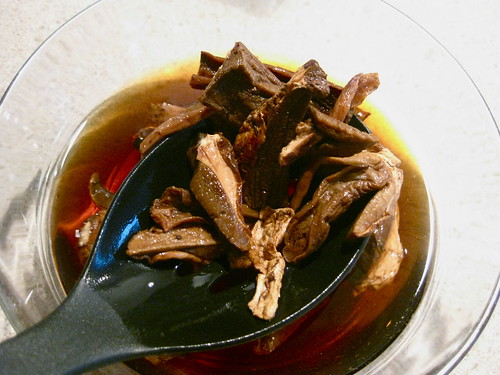
- 1/2 cup dried porcini mushrooms
- 2 tablespoons olive oil
- 1 teaspoon truffle oil (optional)
- 2 cloves garlic, diced finely
- 1/2 cup pouring cream
- 1 teaspoon porcini powder (or beef stock powder)
- 1/2 teaspoon chopped thyme
- fresh pasta sheets (a box of dried pasta sheets is acceptable in a pinch)
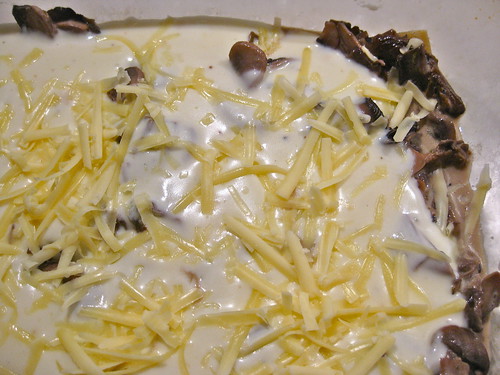
- 1 1/2 cups grated cheese
Bechamel Sauce
- 1/2 cup butter
- 1/2 cup plain flour
- 3 1/2 cups milk
- 1/2 cup pouring cream
- salt and pepper to taste (truffle salt if you have it)
Kick off by slicing your mushrooms to roughly equal thickness and size. Brush any grit from the mushrooms prior to slicing them. Now, in a pyrex bowl, soak your porcini mushrooms in 1 1/2 cups boiling water for at least 15 minutes. The water will turn a golden brown colour and any grit will settle to the bottom the bowl. Don't throw this water out, we'll be using a little of it later.

Next heat the olive oil in a pan and add the garlic. After about 30 seconds, add in the field mushrooms. When they've reduced in size and softened, add in the shitake mushrooms, then the button mushrooms and, finally, the porcinis (use a slotted spoon to remove then from the liquid without stirring up the grit).
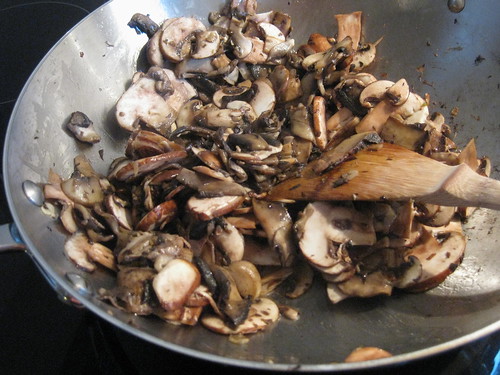
When the mushrooms are looking soft and brown and delicious, drizzle the truffle oil over the tope and then add the cream, stirring, while it bubbles and thickens. Sprinkle the porcini (or stock) powder over the top and stir in until combined, then stir through the thyme. Add one cup of porcini water and allow to reduce again on a brisk simmer until it's nice and thick. Taste and add in salt and pepper according to your taste. Turn off the heat and set aside until we are ready to compose the lasagna.

Now it's time to tackle the bechamel sauce. Melt the butter in a saucepan on a medium heat. Using a whisk, stir in the flour and whisk until it's a thick and yellow paste. Pour in the milk and cream, whisking continuously until it comes to a boil. It will thicken as you do this, so if you think it's taking too long to come to a boil and you start to worry, just check on the back of a wooden spoon to mark the progress of this process.

When the sauce comes to a boil, turn down the heat so it hits a gentle simmer. Pop the lid on the saucepan and leave to simmer for 20 minutes, stirring every five minutes or so. This helps to make sure it's not sticking to the bottom of the pan or becoming gluggy because the heat's too high. Add salt and pepper when the sauce looks thick and delicious - this will add a lot of flavour, so don't put too little seasoning in. Preheat your oven to 200 degrees Celcius while you are watching the bechamel.
Line your lasagna dish with a layer of fresh pasta. Now add a layer of bechamel at least one centimetre thick. Now a layer of mushrooms and top it off with a sprinkle of grated cheese. Add another layer of pasta, then bechamel, then mushrooms. Finally, add a last layer of pasta, followed by bechamel and cheese on top - no mushrooms on the top layer.


Bake for 30 minutes, or until golden brown on top and bubbling hot. I recommend allowing it to sit outside the oven for around ten minutes while it settles and cools slightly. This helps it "set" so it holds together a bit better for serving.
Serve with a light, crisp green salad, to counteract the cream and butter in the sauce...